Italian Rainbow Sandwich Cookies
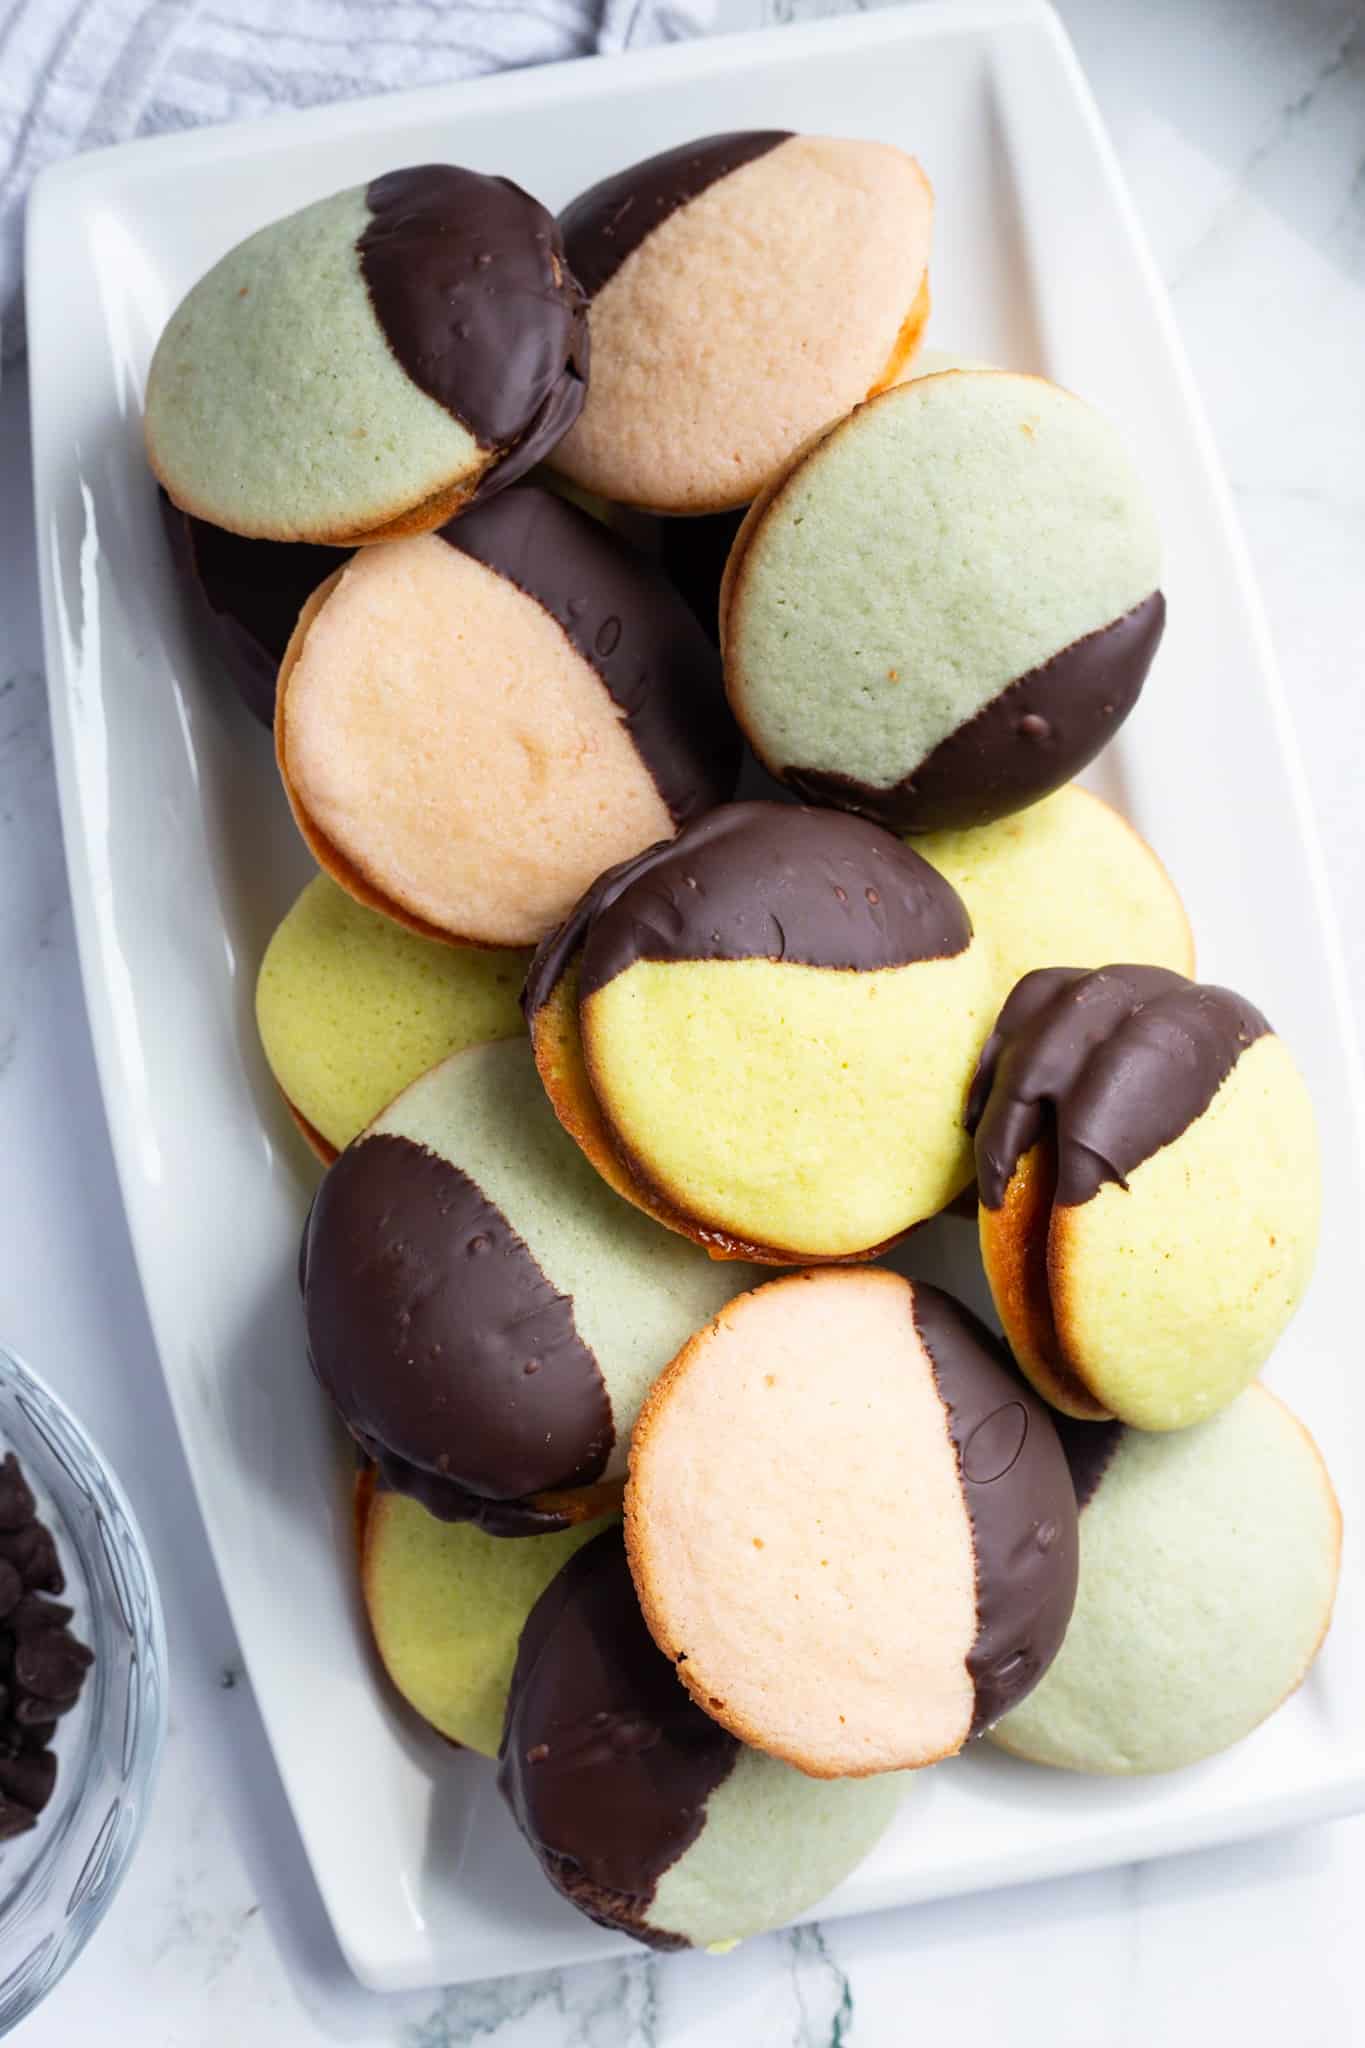
Here’s the Italian rainbow cookie we all know and love, reinvented as pastel-colored sandwich cookies for the Easter holiday!
This post may contain affiliate links. Please read our affiliate disclosure.

Italian Rainbow Sandwich Cookies
Who doesn’t love Italian rainbow cookies? The fact that they go by about seven other names alone is a good indicator of how popular they are. A cookie that frequently appears at Christmas, it makes you feel like they were worth waiting an entire year for, even if they’re not the quickest to whip up in the kitchen.
Not surprisingly, many people are turned off by these cake-like cookies precisely because they’re a bit time-consuming. The reward, however, is in their utter deliciousness. They truly do make the work — and a small amount of patience — worth it in the end, especially when you see the delight on people’s faces when you present them with these colorful treats.
I came up with the idea to make the classic Italian rainbow cookie in sandwich form because I was looking for an easier version than the original. I also wanted to change the traditional Italian flag colors to pastels for the Easter holiday. Now, I’m not going to lie: They still require a little bit of work, but I like that you don’t have to ensure that each of the three batters is exactly the same size nor worry about spreading each layer evenly onto each pan. With these Italian rainbow sandwich cookies, you simply scoop the batter and drop it onto a cookie sheet. You also don’t have to allow them to set before applying the chocolate.
Ingredients You’ll Need
- Almond Paste
- Granulated Sugar
- Unsalted Butter
- Large Eggs
- Almond Extract
- All-purpose Flour
- Fine Salt
- Red, Green, and Yellow Food Coloring (or any colors you’d like)
- Apricot Preserves (or raspberry)
- Semi-sweet Chocolate
Why You’ll Love These Italian Rainbow Sandwich Cookies
They’re easier to make than the traditional cookies: These take less time but taste exactly like the ones you know and love.
You can be less precise: Because you’re not dealing with layers here, you don’t have to painstakingly ensure that the three separate batters are evenly divided. No one will care if you end up with a couple of more pastel pinks than butter yellows.
They taste better the longer they sit: This is true of many baked goods, but the almond flavor comes through more here, and the cookies have more time to absorb the flavor of the jam, making them taste even more divine a day or two — or three — later. That’s if they last that long.
Pro Tips
Break up the almond paste with a fork before mixing it: It’s much easier to get it going than if you leave it in one big block.
Remember to clean any utensils you might use when moving between batters: You don’t want to transfer one food coloring to another, so be sure to clean utensils like spatulas, spoons, and cookie scoops between bowls. If you have them, you can also keep three spatulas, three cookie scoops (the same size), etc., on hand and designate each one to its own bowl.
Use your best judgement when applying the food coloring: Begin by adding a few drops of food coloring to each batter and mixing it in. Continue to add several drops more until you reach the desired color.
Suggestions for Variations and Substitutions
- Use any food coloring you like (red, green, yellow, blue, purple, etc.).
- You can substitute the semi-sweet chocolate with bittersweet chocolate.
- Use raspberry preserves instead of apricot, or use a mix of both!
Leftovers
Store in an airtight container at room temperature for a day or two or in the refrigerator for up to one week. You can also freeze them for up to three months. Defrost at room temperature.
Looking for other ways to satisfy your sweet tooth? Try these almond cocoa cookies.

Italian Rainbow Sandwich Cookies
Ingredients
- 8 ounces almond paste
- 1 cup granulated sugar
- 2 and 1/2 sticks unsalted butter, softened
- 4 large eggs, whites and yolks separated
- 1 teaspoon almond extract
- 2 cups all-purpose flour (spooned and leveled) (See Note 1)
- 1/2 teaspoon fine salt
- 10 drops red food coloring (or more)
- 10 drops green food coloring (or more)
- 10 drops yellow food coloring (or more)
- 13 ounce jar of apricot preserves, strained
- 1 and 1/2 cups semisweet chocolate, melted
Instructions
- Preheat the oven to 350F. Line 2 cookie sheets with parchment paper. You can lightly oil the pans first to help the parchment paper stick, but it's not necessary.
- Meanwhile, place the almond paste in a large bowl and break it up with a fork. Add the sugar and 1 stick of the softened butter and mix it with an electric mixer until well blended but still crumbly, about 3 minutes. Add the remaining butter and continue mixing until smooth, about 2 minutes, scraping down the sides of the bowl with a spatula as needed. At this point, the batter will be smoother and pastier.
- Add the egg yolks to the butter mixture one at a time, followed by the extract, while blending everything together. Add the flour (in 4 to 5 batches) and salt and mix until combined. The batter will be thicker by now, so increase the speed of your mixer if necessary. Set aside.
- Whip the egg whites separately in a small bowl using your mixer (fitted with clean blades) until they turn thick and frothy and form stiff peaks, about 3 to 5 minutes. Fold the egg whites into the flour mixture with a spatula just until incorporated. The batter should be smooth.
- Divide the batter evenly into 3 bowls. Stir the red food coloring into one bowl of batter until evenly pink; stir the green food coloring into the second bowl until evenly soft green; stir the yellow food coloring into the third bowl until evenly pale yellow. (You may need to add more food coloring than what is listed in the ingredient list to achieve the desired color.) Refrigerate the green and yellow batters while you work with the pink.Important: Use a clean kitchen tool when handling each bowl of batter so you don't transfer one food coloring to another.
- Using a cookie scoop with a 1.6" diameter, scoop out a portion of the batter and place it onto a cookie sheet. Do not flatten. Fill the 2 cookie sheets with 6 to 8 cookies each. Place the cookie sheets in the oven on the middle rack and bake for 8 to 12 minutes, until the edges turn golden brown and the tops are set. Remove the pans from the oven and allow them to cool for a few minutes before transferring the cookies to a rack. Repeat this process until all 3 batters have been baked.
- Once the cookies have cooled, spread 1 and 1/2 to 2 teaspoons of apricot jam on the bottom side of one cookie, and top it off with the bottom side of another cookie (same color). Repeat the process with the remaining cookies.
- Melt the chocolate in a bowl in the microwave or in a saucepan on the stove. It's best to use a bowl on the smaller side so the chocolate doesn't spread too thin. Dip 1/4 to 1/3 of each cookie into the melted chocolate and set each on wax paper. Once done, place the cookies in the refrigerator for about 30 minutes to help the chocolate set. Afterward, you can leave them in the fridge or let them sit at room temperature.
